How to clean leather couches at home comes down to two things: using the gentlest cleaner that can do the job, and keeping moisture under control so you don’t end up with water marks, dull patches, or sticky residue.
If your couch looks “fine” until sunlight hits it, you’re not imagining things, body oils, dust, and product buildup show up as shine, dark headrest areas, and that slightly tacky feel. Cleaning fixes the look, but it also helps the leather stay flexible so it’s less likely to crack over time.
One quick heads-up before we get practical: “leather” covers a lot of finishes. Some couches tolerate mild soap easily, others are top-coated and react to the wrong conditioner, and some are actually bonded or faux leather that needs different care. I’ll show you how to figure that out in a minute.
Know your leather first (this prevents most mistakes)
Before you clean, confirm what you’re working with. Many “leather” sofas in the US are pigmented and top-coated, which is fairly forgiving, while aniline or semi-aniline leather looks beautiful but can stain faster.
- Pigmented/protected leather: more uniform color, slight sheen, usually easier to maintain.
- Aniline/semi-aniline: softer, more natural look, absorbs liquids quicker, spot tests matter.
- Bonded or faux leather: can peel or haze with conditioners made for real hide.
Look for the manufacturer tag or care code if you still have it. According to the American Leather Chemists Association (ALCA), leather care should be matched to the leather finish and chemistry, and harsh solvents can damage coatings and dyes.
Quick rule: if a drop of water darkens the surface immediately and takes time to fade, treat it like absorbent leather and keep cleaners very mild, with minimal moisture.
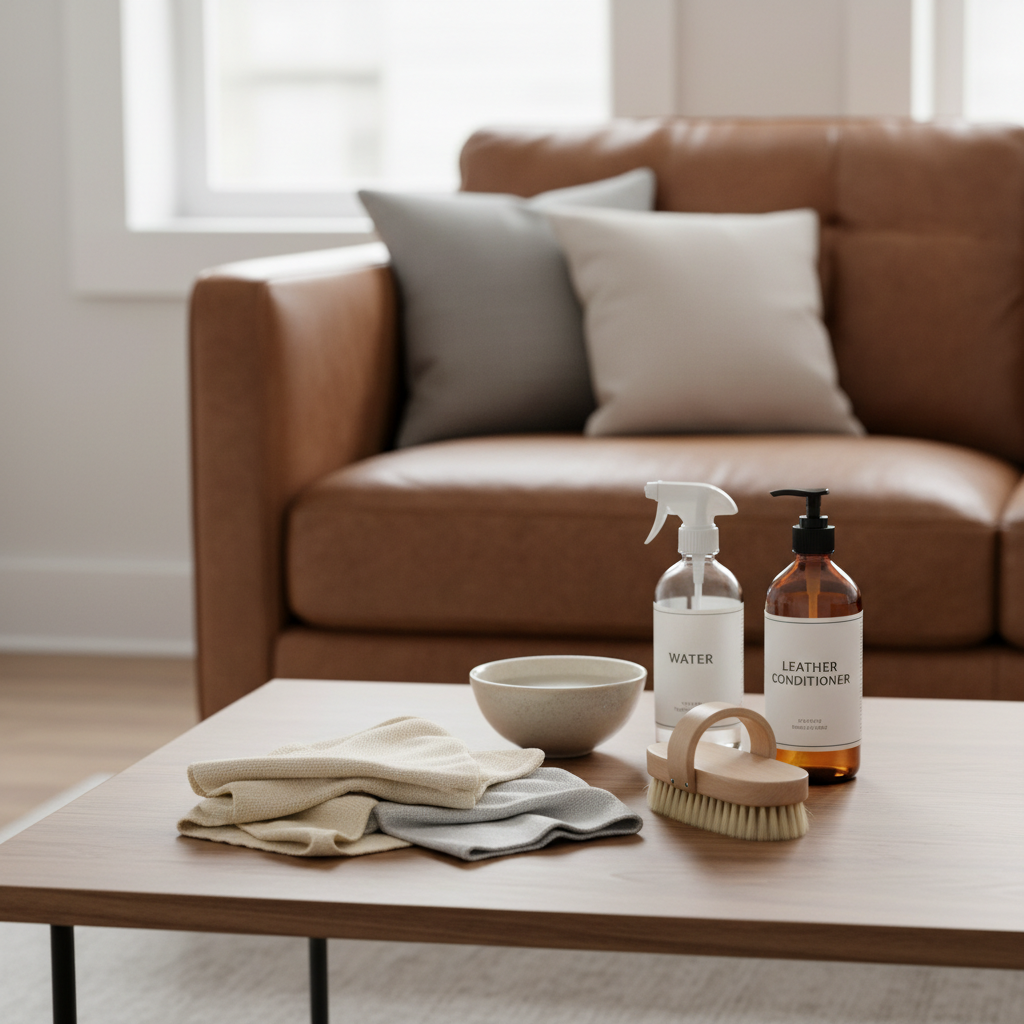
What you’ll need (simple kit, no fancy gadgets)
You can clean leather couches at home with a small set of basics. Skip anything abrasive, and avoid soaking the surface.
- 2–4 microfiber cloths (one for cleaning, one for rinsing, one for drying)
- Vacuum with a soft brush attachment
- Distilled water (helps reduce spotting in many homes)
- Mild soap option: a drop of gentle dish soap in water, or a leather-specific cleaner
- Leather conditioner made for your leather type (optional but useful)
- Soft toothbrush or soft detailing brush for seams
Avoid: bleach, ammonia, vinegar “hacks,” disinfecting wipes, magic erasers, and heavy oils. Those often cause dulling or sticky buildup, and some can strip topcoats.
Self-check: do you need a full clean, spot clean, or deep reset?
Most people over-clean the whole couch when they only need targeted work. Use this quick checklist to pick the right level.
- Full clean: overall dingy look, uniform shine from body oils, dusty seams, mild odor.
- Spot clean: visible mark, food drip, ink line, small dark patch on an armrest.
- Deep reset (careful): sticky feel from past products, cloudy film, frequent headrest darkening.
If you see cracking, peeling, or color rubbing off onto a cloth, pause. That’s often a sign to use a professional leather technician or the manufacturer’s recommended service, because aggressive cleaning can make it worse.
Step-by-step: how to clean leather couches at home (safe baseline method)
This is the routine that fits most protected leather couches and keeps risk low. Plan for 30–60 minutes depending on size and how detailed you get with seams.
1) Dry clean first: vacuum and dust
Vacuum cushions, creases, and seams using a soft brush attachment. Then wipe the surface with a dry microfiber cloth. Dry removal matters because grit acts like sandpaper when you start wiping with moisture.
2) Mix a gentle cleaner (or use leather cleaner)
In a bowl, combine distilled water with a tiny drop of mild dish soap. You want barely any suds. If you’re using a leather cleaner, follow label dilution instructions and don’t “double up” with soap.
3) Spot test in a hidden area
Test behind a cushion or low side panel. Wipe lightly, wait 10–15 minutes, then check for darkening that doesn’t fade, discoloration, or tackiness.
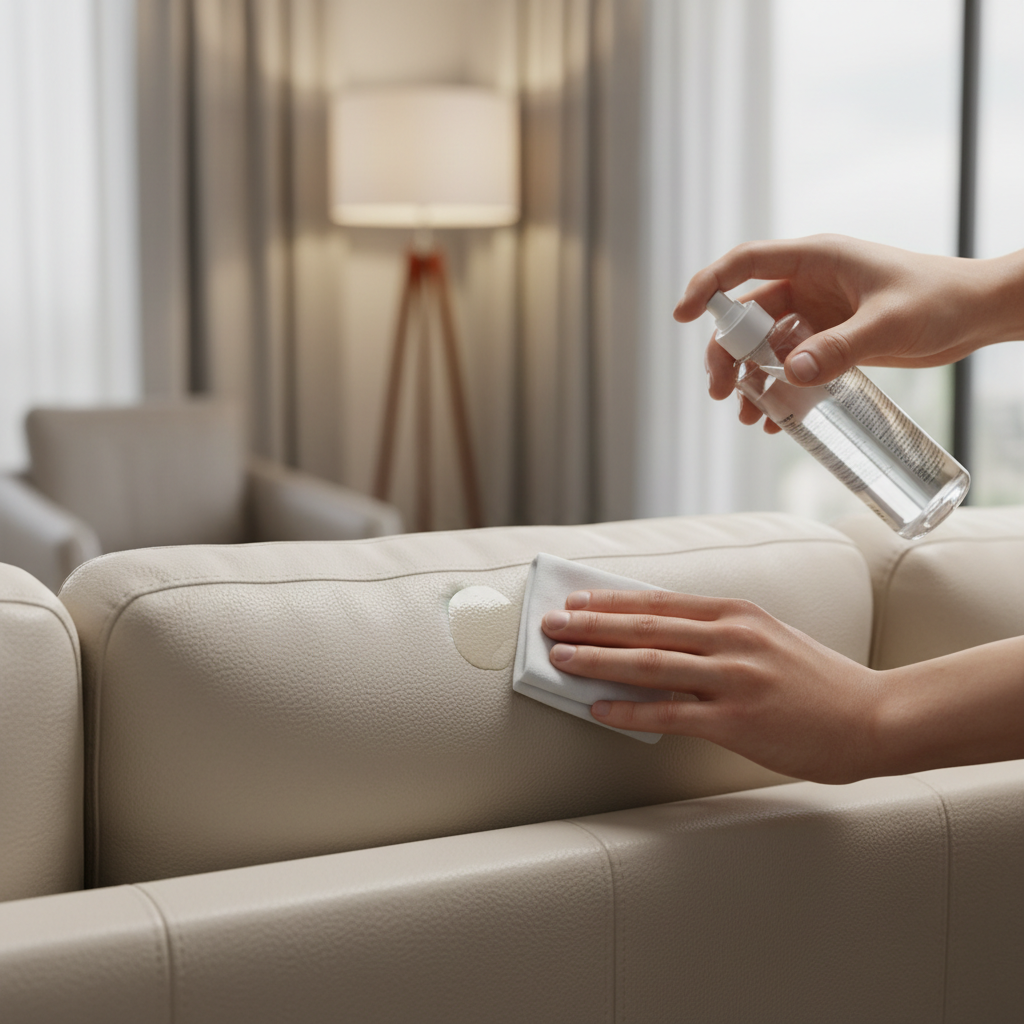
4) Wipe in small sections, don’t soak
Dampen (not wet) your cloth, wring it well, then wipe a 2–3 square foot area. Keep pressure light, and let the cloth do the work. For seams, use a soft brush, then wipe away loosened grime.
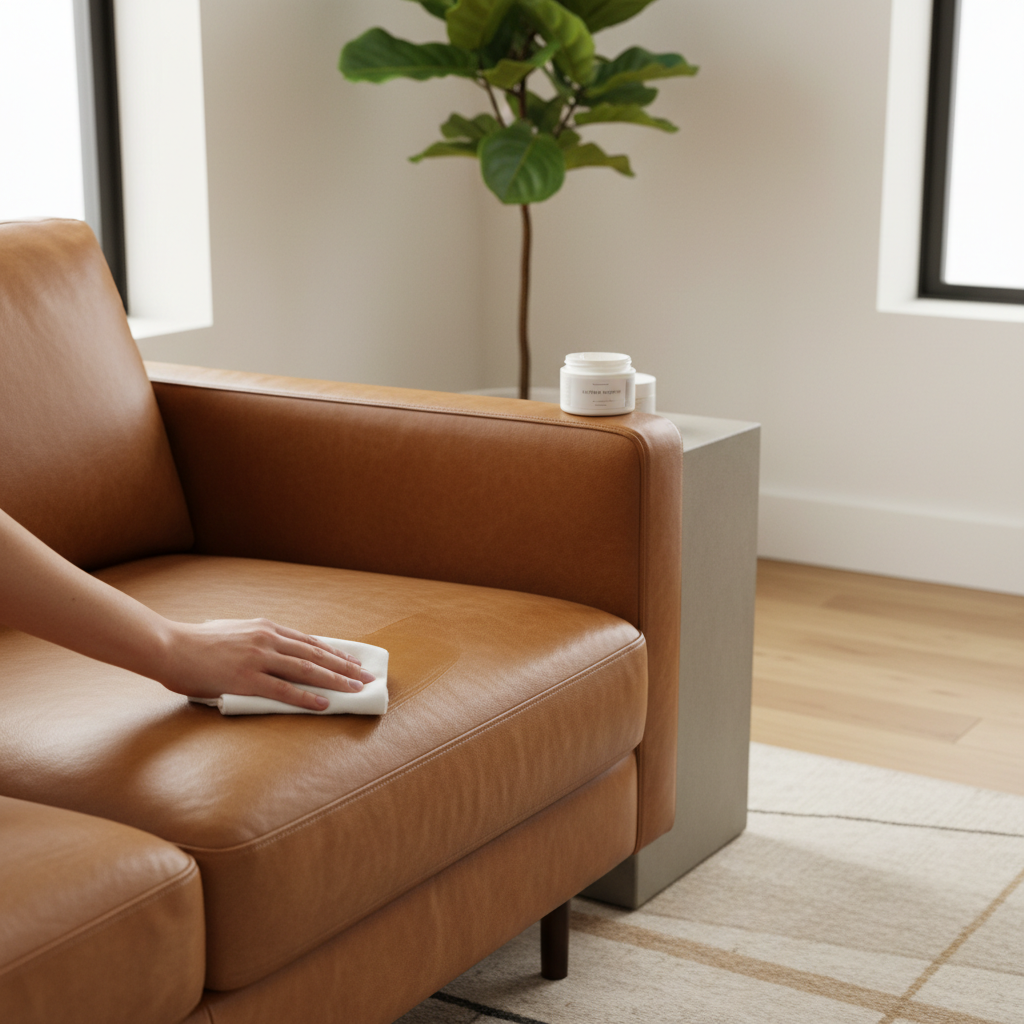
5) “Rinse” with a clean damp cloth
Use a second cloth dampened with plain distilled water to remove any soap residue. This step is boring, but it’s where streaks and stickiness usually get prevented.
6) Dry immediately
Buff dry with a fresh microfiber cloth. Leave cushions slightly separated for airflow, and keep the couch out of direct sun until fully dry.
Common stains and what usually works (and what often backfires)
Real life is messy, so here’s a practical guide. With any stain, start gentle and escalate only if needed. If a stain is valuable or the leather is delicate, it may be worth calling a pro instead of experimenting.
| Stain type | What to try first | What to avoid |
|---|---|---|
| Body oil / shiny headrest | Gentle soap solution wipe + rinse + dry buff | Alcohol wipes, heavy oils, over-conditioning |
| Food drips | Blot, then damp cloth with mild cleaner, repeat | Scrubbing hard, soaking the spot |
| Ink | Manufacturer-recommended ink remover or pro help | Hairspray, acetone, nail polish remover |
| Mildew smell | Dry out room, improve ventilation, gentle clean | Bleach, saturating leather, sealing moisture in |
| Water spots | Lightly dampen larger area and even it out, then dry | Heat blasting, spot-wetting only the ring |
According to the U.S. Environmental Protection Agency (EPA), indoor humidity control and ventilation are important for limiting mold and mildew growth. If you suspect mold inside cushions or framing, a professional assessment is often safer than repeated DIY wet cleaning.
Conditioning: when it helps, when it’s just adding grease
Conditioner can be useful, but it’s not a weekly step. Many protected leathers already have a topcoat, so constant conditioning can leave a film that attracts dust and creates that “always shiny” look.
- Condition every 6–12 months for most households, sometimes less if the couch stays soft.
- Condition sooner if the leather feels dry, looks slightly ashy, or squeaks when you sit.
- Skip it for now if you’re still fighting tackiness or streaking, clean residue first.
Apply a small amount to a cloth, spread thinly, then buff. If the surface feels oily after 20–30 minutes, you used too much.
Mistakes that cause cracking, discoloration, or “mystery streaks”
A lot of leather “damage” is really the result of the wrong cleaner or too much water, repeated over time. These are the patterns that show up most often.
- Using vinegar or harsh degreasers: they can dull the finish and dry the surface.
- Over-wetting one spot: creates tide marks, especially on more absorbent leather.
- Scrubbing with rough pads: micro-scratches turn into permanent dull patches.
- Conditioning as a shortcut for cleaning: it can trap grime and make the couch look worse.
- Skipping the rinse wipe: leftover soap is a common reason for streaks.
Key takeaway: gentle, thin layers win. Your goal is “clean and dry,” not “wet and shiny.”
When it’s smarter to call a professional
DIY cleaning is great for routine care, but some situations are expensive to guess on. Consider professional help if any of these apply.
- Large ink stains, dye transfer, or mystery discoloration that spreads
- Peeling, flaking, or color coming off on your cloth
- Pet urine that soaked into seams or cushions, odors that keep returning
- Antique, aniline, or very light-colored leather where spot marks stand out
If the couch is still under warranty, check the care instructions before trying solvents or “all-purpose” products, because warranty terms often require approved methods.
Practical maintenance plan (so cleaning stays easy)
If you want this to feel manageable, treat it like a quick routine, not a big seasonal project. Most homes do fine with a simple cadence.
- Weekly: quick vacuum of seams and under cushions, dry microfiber wipe on high-touch areas.
- Monthly: gentle clean of armrests, headrests, and seat fronts.
- Twice a year: full clean and light conditioning if the leather benefits from it.
Key points to remember: test first, use minimal moisture, rinse off residue, dry as you go, and keep the couch away from direct heat and strong sun during drying.
If you’re ready to clean this weekend, pick one small section and do the spot test, once you see how your leather reacts, the rest of the process becomes pretty straightforward.
FAQ
- What is the safest homemade cleaner for leather?
For many protected leathers, a very dilute mix of distilled water and a tiny drop of mild dish soap works well. The safer move is always a spot test, because more absorbent leather can darken. - How often should I clean a leather couch at home?
High-touch areas usually need light cleaning every few weeks, while full-couch cleaning is often monthly or quarterly, depending on kids, pets, and how quickly oils build up. - Can I use Clorox or disinfecting wipes on leather?
Many disinfecting wipes contain alcohol or other ingredients that can dry or discolor leather finishes. If disinfection is a concern, consider asking the manufacturer what products they approve. - Why does my leather couch look streaky after cleaning?
Most streaks come from too much cleaner, not rinsing, or letting damp areas air-dry unevenly. A plain-water wipe and immediate buff-dry often fixes it. - Is vinegar and water OK for leather couches?
It can be risky, especially on top-coated leather where acids may dull the finish over time. A mild soap solution or leather-specific cleaner is usually the safer baseline. - What should I do if my couch feels sticky?
Sticky leather is often product buildup. Try a gentle clean with a rinse wipe, then dry buff, and avoid conditioner until the tacky feel is gone. - How do I get rid of odor in a leather couch?
Start with vacuuming seams, wiping with a gentle cleaner, and improving ventilation. If odor suggests mildew or pet urine inside cushions, professional cleaning may be more effective and safer than repeated wet wiping.
If you’re cleaning a light-colored sofa, dealing with recurring stickiness, or you’d rather not experiment with spot tests, a leather-specific cleaner and conditioner kit can be a more predictable, lower-drama option than trial-and-error household products.