diy candle holders home decor projects are one of those rare wins where you get instant “cozy” without repainting a room or buying all new stuff. If your shelves feel flat, your dining table looks unfinished, or your bathroom counter feels cluttered, a candle holder can pull the look together in minutes.
What makes these projects worth your time is the mix of impact and flexibility, you can match your style (modern, farmhouse, boho) and use materials you already have. But the part people skip is function, a candle holder has to look good and keep heat, wax, and flame in check.
Below you’ll get a clear set of ideas, a quick way to choose the right project, and the safety details that keep “cute decor” from turning into a headache. I’ll also flag the common mistakes that waste time or make holders wobble.
What makes a candle holder “work” in real homes
Before glue guns and paint, it helps to judge a holder the way you’d judge a piece you’d actually keep on display, stability, heat tolerance, and cleanup.
- Stability: Wide base, low center of gravity, no rocking. If you bump the table, it should not tip.
- Heat management: Tea lights and pillars heat surfaces differently, and some materials (thin plastic, some finishes) can soften or discolor.
- Drip control: Taper candles are the mess-makers, so you want a drip plate, a snug taper cup, or both.
- Easy cleaning: If you can’t remove wax without scraping for 20 minutes, you’ll stop using it.
According to the National Fire Protection Association (NFPA), candles are a common home fire source in many households, so design choices that keep flames away from clutter and reduce tipping matter more than people expect.
Quick self-check: pick the right DIY for your space
If you’ve ever made something that looked great on the workbench but felt “off” in the room, this is usually why, the wrong candle type, wrong scale, or wrong placement.
- If you decorate small areas (bathroom vanity, narrow shelf), choose tea light or votive holders with low profiles.
- If you want height on a table, build taper holders or stacked holders, but prioritize a heavier base.
- If kids or pets roam, use enclosed glass hurricanes, lantern-style holders, or LED candles.
- If you hate mess, avoid tapers unless you add a drip dish, votives in glass are easier.
- If your style changes often, pick paintable, swappable pieces like simple wood blocks or removable wraps.
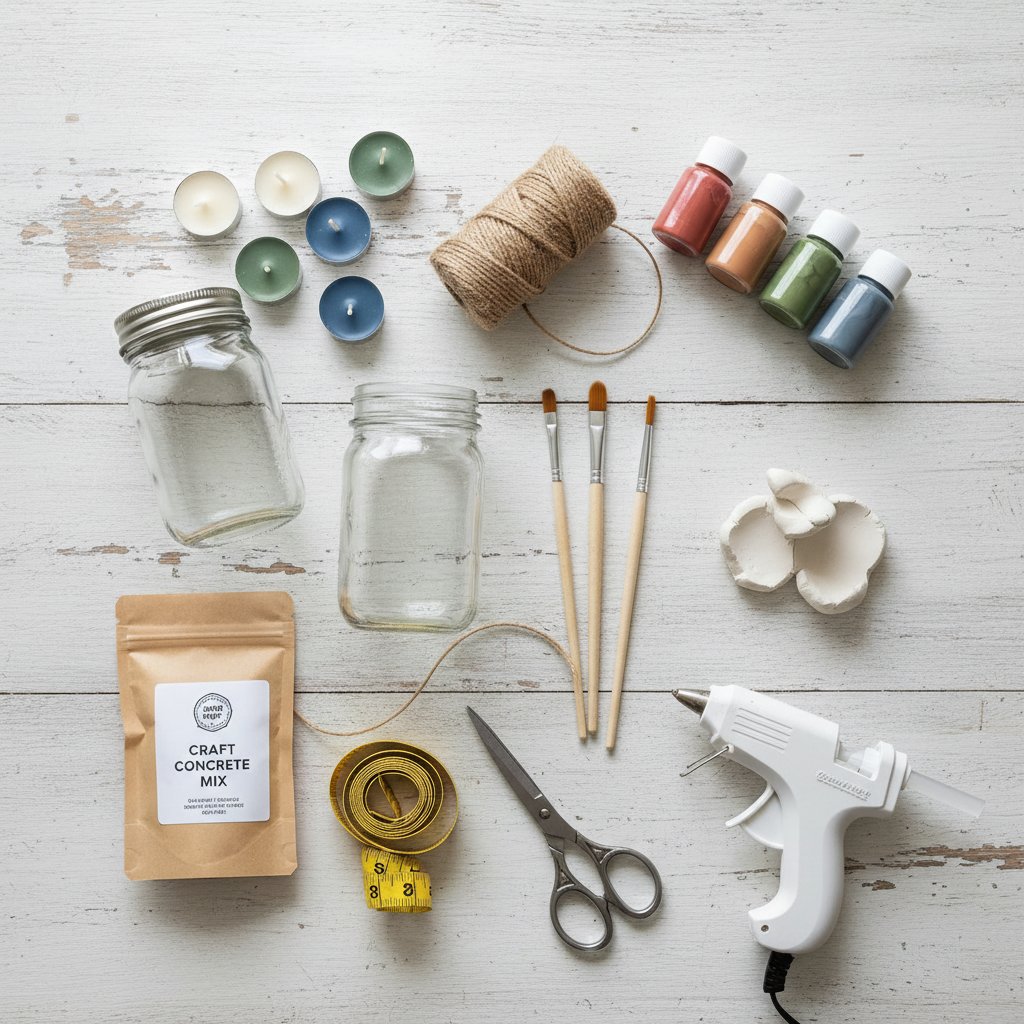
Materials cheat sheet (with time, cost, and difficulty)
This table helps you avoid the “I’ll just wing it” moment that ends with scorched paint or a holder that never feels stable. Costs vary by what you already own, so treat this as a planning guide.
| Project base | Best for | Approx. time | Difficulty | Notes |
|---|---|---|---|---|
| Glass jar (mason/jam jar) | Votives, tea lights | 15–40 min | Easy | Great drip control, decorate outside only |
| Wood block or scrap lumber | Tea lights, LED | 30–90 min | Medium | Use a drill bit sized for tea lights, avoid direct flame on wood |
| Air-dry clay | Modern sculptural holders | 45–120 min + dry time | Medium | Seal surfaces, heat resistance varies by brand |
| Concrete | Minimal, heavy holders | 60–120 min + cure time | Medium | Very stable, messier process |
| Metal tray + accents | Centerpieces | 20–60 min | Easy | Use as a “base” to group candles safely |
Key point: if you plan to use real flames, favor glass, ceramic, metal, or thick concrete near heat, and keep flammables as purely decorative outer layers.
5 easy DIY candle holder projects that look “store-bought”
These ideas are meant for normal weekends and normal homes, no fancy tools required beyond what many households already have.
1) Wrapped glass votive holders (clean, simple, forgiving)
- Start with a clean glass jar or votive cup.
- Wrap twine, raffia, or a thin leather cord around the outside, secure with small dots of heat-safe adhesive on the exterior only.
- Add a minimal label or tag for a giftable look.
Style tip, keep wraps below the rim so heat has room to vent upward, and skip bulky bows if you plan to burn long candles.
2) Frosted “sea glass” effect jars (soft light, easy to match)
- Use glass paint or a frosting spray designed for glass, apply in thin coats.
- Let it fully cure before use, follow the product label for timing.
- Pair two or three sizes together for a layered glow.
This is a go-to for bathrooms and bedrooms because the light reads gentle, not harsh.
3) Wood block tea light holder (rustic without clutter)
- Choose a thick scrap wood piece, sand edges so it feels finished.
- Drill shallow recesses sized for standard tea light cups, test the fit before drilling all holes.
- Finish with a heat-tolerant clear coat if you want a cleaner look, or leave it raw for a natural vibe.
If you’re using real tea lights, watch for scorch marks over time, many people switch these to LED for everyday use and save real flames for supervised moments.
4) Air-dry clay ring holders (modern, sculptural, customizable)
- Roll clay into coils, shape into rings or stacked loops.
- Create a flat seat for a metal tea light cup, so flame never contacts clay directly.
- After drying, sand lightly and seal for a smoother finish.
Clay brands vary, so if you notice softening, odor, or discoloration with heat, use LED candles and treat the piece as decorative.
5) Concrete mini holders (heavy base, minimalist look)
- Mix small-batch concrete, pour into silicone molds or disposable cups.
- Insert a taper cup or tea light insert while curing, remove carefully after set.
- Seal once cured to reduce dust and staining.
Concrete reads expensive when you keep the shapes simple and edges clean, this is a solid option for diy candle holders home decor in modern spaces.
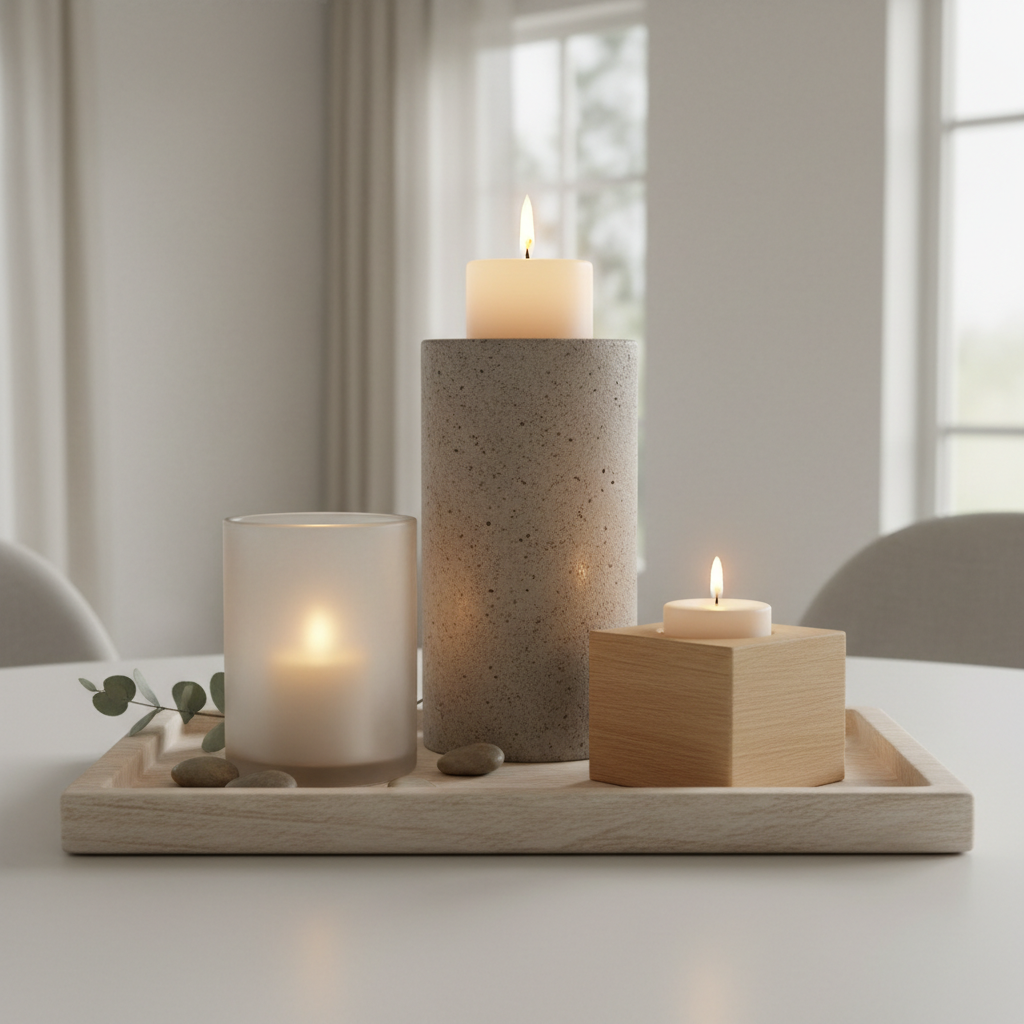
Practical styling: where candle holders actually help a room
Most people don’t need more decor, they need better placement. Candle holders work because they add height, reflection, and warm light, but they can also add visual clutter fast.
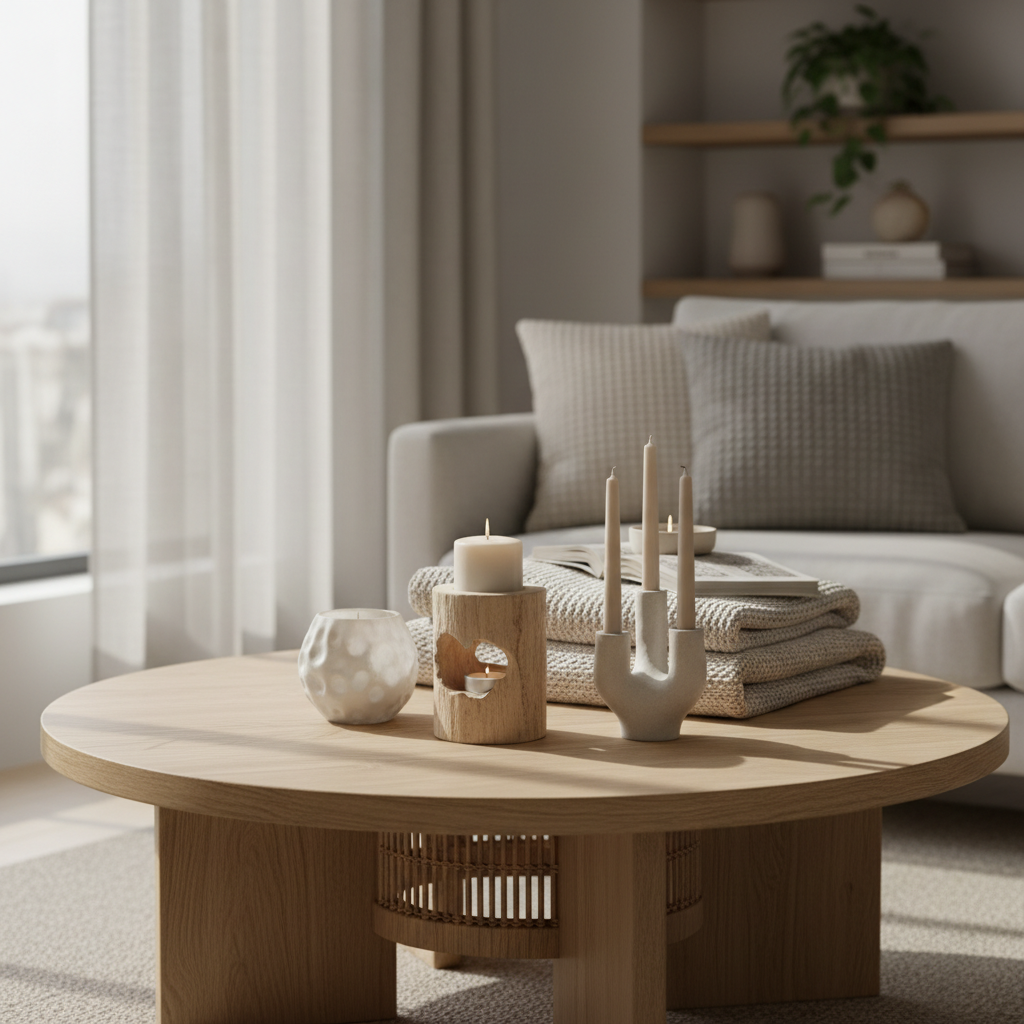
- Dining table: Use an odd number (3 or 5) in staggered heights, keep scents light if you eat there often.
- Coffee table: Put holders on a tray with one book or small vase, this “contains” the look.
- Bathroom: One frosted votive near the tub reads spa-like, keep it away from towels.
- Entryway: A single lantern-style holder creates a welcoming focal point without taking surface space.
Quick rule: if you can’t wipe the surface in one pass because decor blocks everything, scale down and group items on a tray.
Safety notes and common mistakes (so the DIY stays fun)
There’s a difference between a pretty holder and a safe setup. Real flames deserve a little respect, especially in small apartments or busy family homes.
- Mistake: decorating the inside of glass, paint or glue inside can off-gas or discolor, keep finishes on the exterior.
- Mistake: unstable taper holders, tall candles amplify wobble, use a weighted base and a snug taper cup.
- Mistake: mixing flame with dried botanicals, dried florals, moss, and paper are better as table accents, not touching the holder rim.
- Mistake: placing near drafts, vents and open windows make flames flicker and increase drip mess.
According to the U.S. Fire Administration (USFA), candles should be kept away from things that can burn and should not be left unattended, if you’re styling for daily life, LED candles can be the more realistic choice.
Step-by-step plan: finish one project this weekend
If you want a simple path that avoids overthinking, this sequence works for most diy candle holders home decor projects.
- Pick the candle type first: tea light, votive, taper, or pillar, then design around its size and heat.
- Choose one material family: all glass, all neutral clay, or wood + black metal, cohesive beats complicated.
- Make two test pieces: one “keeper” and one “learning piece,” you’ll work faster without trying to be perfect.
- Do a 10-minute stability check: place on the real surface, bump test gently, confirm it sits flat.
- Style in a small cluster: group 2–3 holders with one non-candle object, then stop, don’t crowd it.
Mini checklist before lighting: clear the area, trim wick if needed, use a heat-safe base, and if anything smells odd or feels unstable, skip burning and use LED until you adjust the design.
Conclusion: keep it simple, then make it yours
When diy candle holders home decor turns out well, it’s usually not because the idea was complicated, it’s because the holder fits your candle type, your room scale, and your real-life habits. Start with one style direction, build a small set, and let them move around the house until they land where you feel the difference.
If you want momentum, pick the wrapped glass or frosted jar project tonight, then do a quick tray-style setup on a table you see every day, you’ll know immediately if you want to make a matching second set.