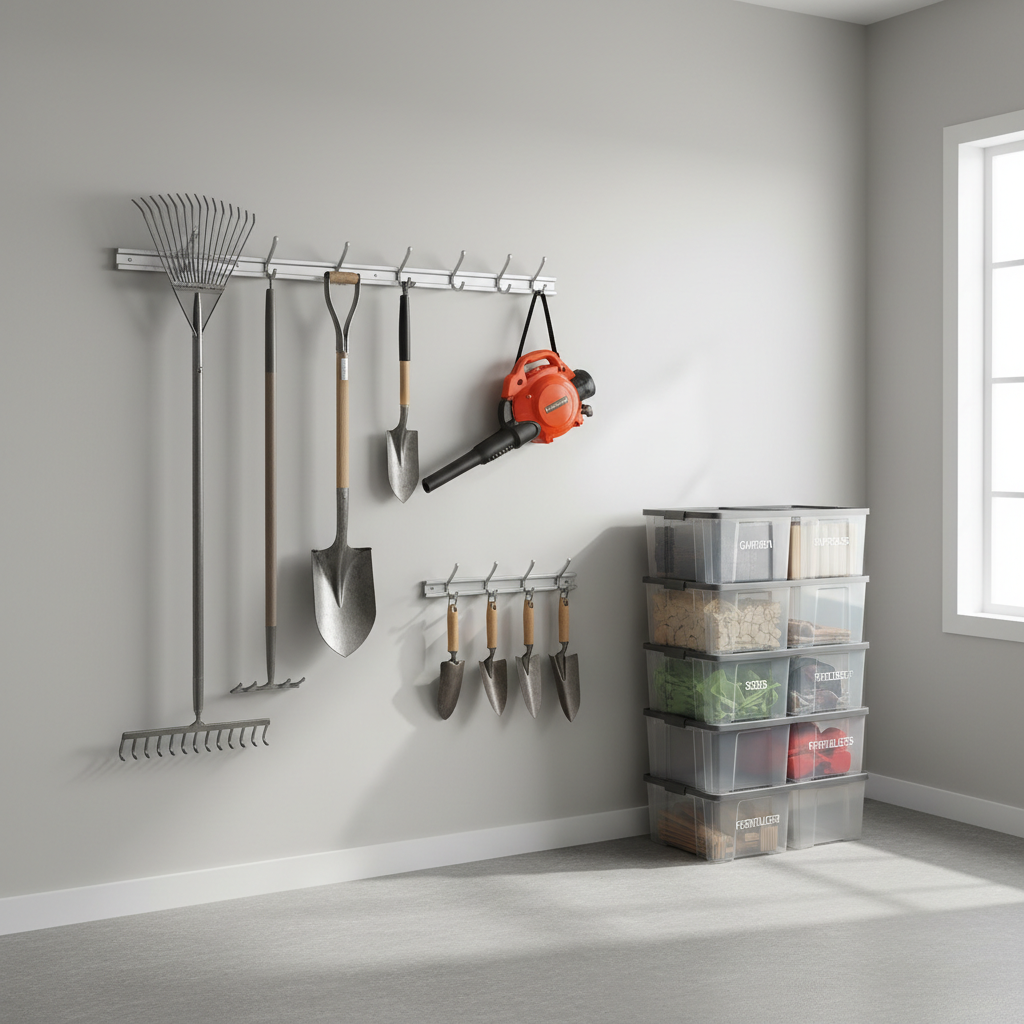
How to organize garden tools on wall hooks comes down to two things: putting each tool on the right hook, and giving every tool a “home” you can reach without wrestling a pile on the floor.
If your rake keeps sliding, your trowels vanish into a bucket, or your hose nozzle lives in three different places depending on the week, it’s not a “you” problem. It’s a storage system problem. The wall is usually the easiest fix because it turns dead space into usable space, and it keeps sharp edges away from feet and pets.
This guide walks through a practical setup that works in real garages, sheds, and small utility rooms. You’ll see how to choose hook types, plan spacing, mount safely, and keep the whole thing from slowly turning into a messy “hook graveyard.”
Why wall hooks work (and why some setups fail)
Wall hooks are simple, cheap, and flexible, but they only stay “simple” if you match the hook to the tool and mount into something solid. Most messy walls fail for one of these reasons.
- Wrong hook shape: a single J-hook can’t reliably hold a D-handle shovel, and a thin wire hook can bend under a digging fork.
- No zones: long-handled tools mixed with hand tools turns quick access into a daily shuffle.
- Bad spacing: tools overlap, snag, then you stop putting them back.
- Weak mounting: drywall anchors can be fine for light items, but many garden tools create leverage that pulls hardware loose over time.
According to OSHA, good housekeeping helps reduce slip, trip, and fall hazards. A wall system won’t solve everything, but getting tools off the floor is one of the most immediate safety upgrades in a working garage or shed.
Quick self-check: what kind of tool wall do you actually need?
Before buying a pack of random hooks, take five minutes and sort your tools into a few groups. This prevents the common mistake of building for “today” and then redoing it two months later.
Tool categories to list (with examples)
- Long-handled: shovel, rake, hoe, cultivator, broom
- Power/awkward: string trimmer, blower, hedge trimmer, sprayer
- Hand tools: trowel, pruners, hori-hori, hand fork
- Dirty/wet items: muddy spades, watering wand, hose accessories
- Seasonal: leaf rake, bulb planter, snow shovel (if shared space)
Two questions that change your layout
- Do you want one-handed grab-and-go, or is “good enough” fine for rarely used tools?
- Are you mounting into studs, plywood, or a slat/rail system (track, French cleat, etc.)?
If you can’t reliably hit studs where you need hooks, consider adding a plywood backer board first. It’s not fancy, but it makes hook placement much easier and often more secure.
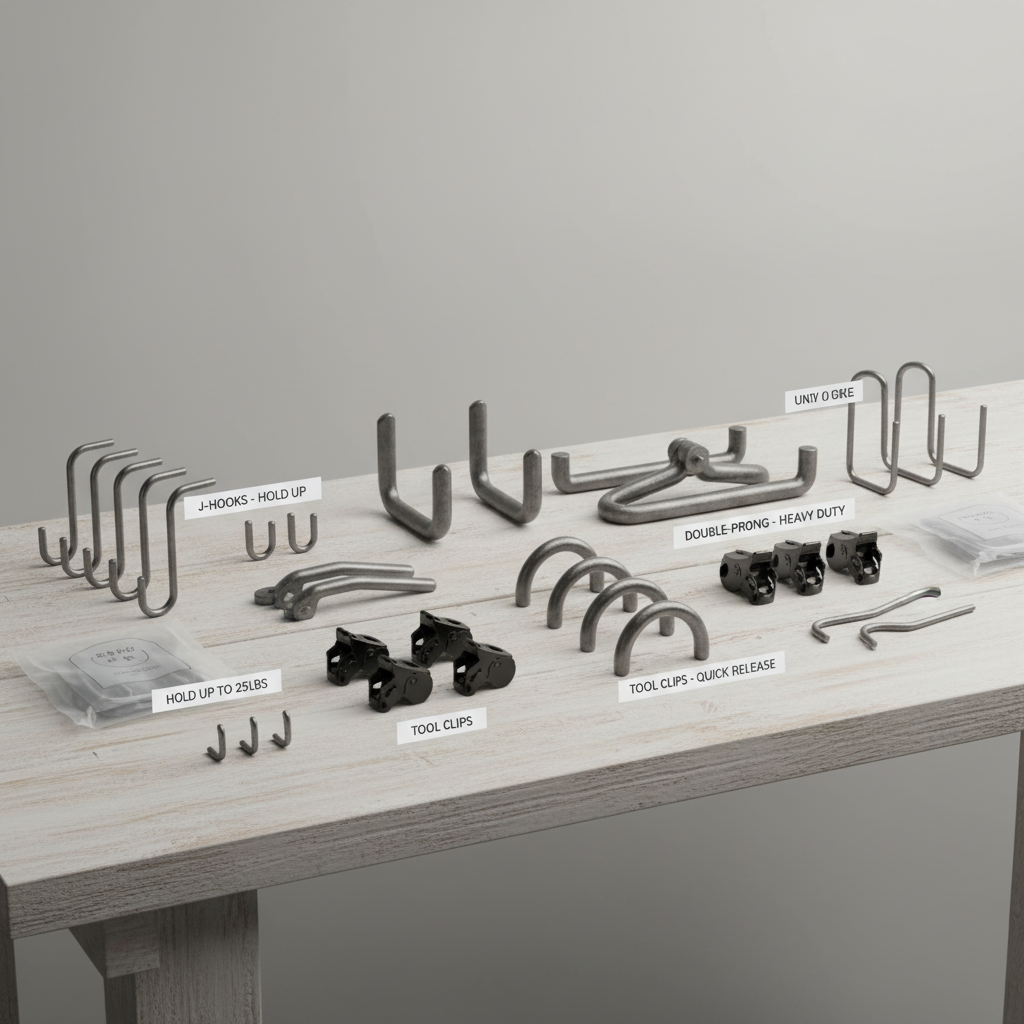
Choose the right wall hooks (and avoid buying twice)
When people search how to organize garden tools on wall hooks, they usually want a shopping list. The better answer is “buy hooks by tool type,” not by whatever assortment pack looks convenient.
Use this table as a quick match-up. Brand names vary, but the hook geometry stays pretty consistent.
| Tool type | Hook style that usually works | Notes |
|---|---|---|
| Rake, broom, hoe | Double prong / U-hook | Cradles the handle, reduces spinning |
| D-handle shovel, spade | Large J-hook or saddle hook | Plan for the D-grip width and tool depth |
| Hand tools | Small J-hooks, peg hooks, or a tool rail with clips | Add a small shelf/bin below for gloves and twine |
| String trimmer / blower | Heavy-duty utility hook | Check load rating and leverage; mount into solid backing |
| Hose nozzle, sprayer tips | Mini hooks + labeled bin | Hooks alone invite loss; bins keep sets together |
Material matters: vinyl-coated steel hooks protect handles and reduce slipping, while bare metal can scratch and squeak. Not a dealbreaker, but it affects day-to-day friction.
Plan the layout: zones, spacing, and “grab path”
The secret to a wall that stays organized is making it easy to put tools back. That’s mostly layout.
Start with two zones (you can add more later)
- Primary zone: tools you use weekly go at shoulder-to-hip height.
- Secondary zone: seasonal or backup tools go higher or farther to the side.
Spacing rules that prevent tangles
- Give long tools breathing room: leave enough side space so heads don’t overlap (rakes are the worst offenders).
- Keep sharp edges away from walkways: point blades inward or toward a corner when possible.
- Group by task: pruning tools together, digging tools together, cleanup tools together.
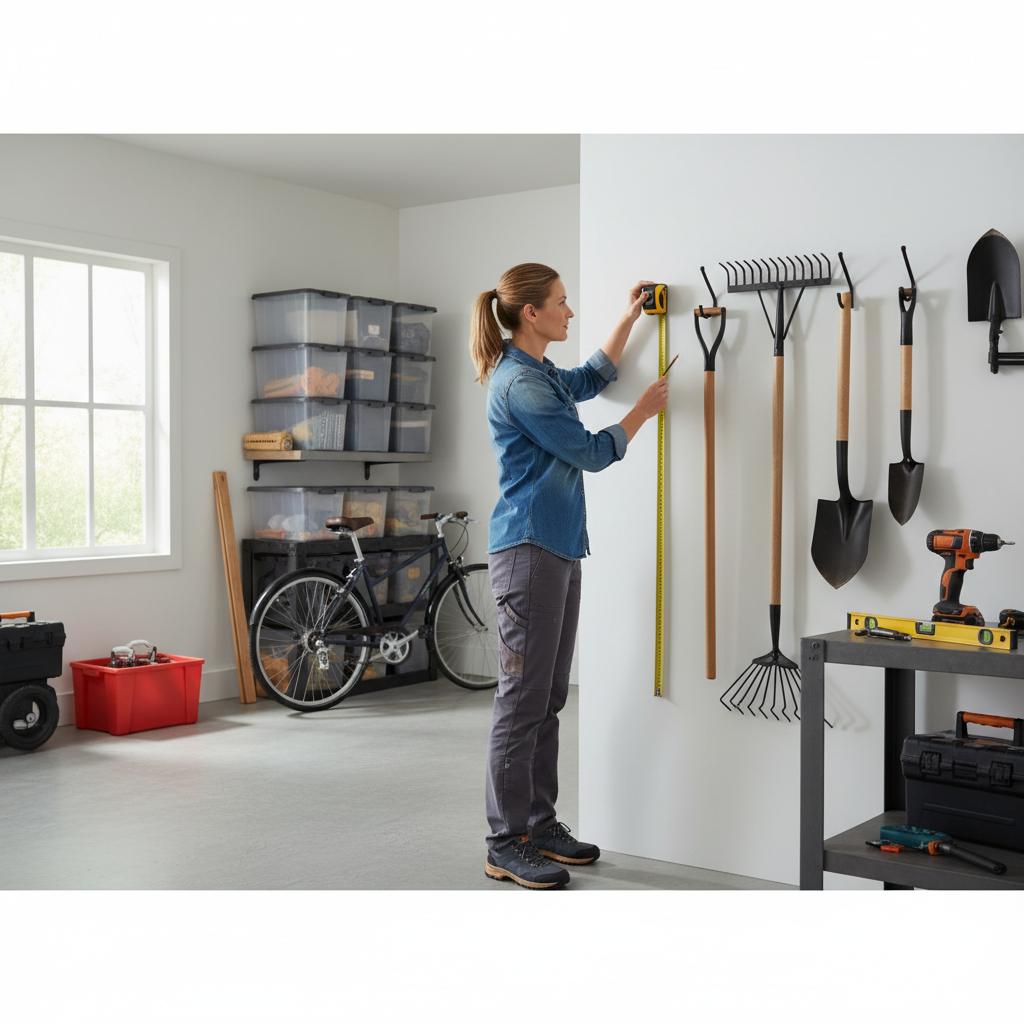
A simple trick: line tools on the floor in the order you want them on the wall, then measure the “real” width. It’s much easier than guessing while standing on a ladder.
Install wall hooks safely: studs, backer boards, and load ratings
This is the unglamorous part, but it’s where a lot of DIY tool walls go wrong. Heavy tools create torque, so the wall fastener matters as much as the hook.
Mounting options (most reliable to most flexible)
- Into studs: strong and simple if stud spacing aligns with your layout.
- Plywood backer board: screw plywood into multiple studs, then place hooks anywhere on the plywood.
- Wall track / rail systems: great for adjustability, but still needs solid anchoring behind the rail.
Fasteners: what to watch
- Check load ratings on hooks and anchors, and remember ratings assume ideal installation.
- Avoid “light duty” drywall anchors for long-handled tools in high-traffic areas; over time, repeated pulling can loosen them.
- Use the right screw length so you actually bite into wood, not just drywall.
If you’re unsure about what’s behind your wall, or you’re mounting near electrical lines, it’s worth slowing down and using a stud finder, and in some situations asking a qualified handyman. “Probably fine” is not a great standard when sharp metal is involved.
Set up the system: step-by-step organization you can finish in an afternoon
Here’s a workflow that keeps you from reinstalling hooks three times.
- Step 1: Empty the area, sweep, and decide how much wall you’re claiming for tools (be honest about future additions).
- Step 2: Sort tools by category and remove duplicates you never reach for, or move them to the secondary zone.
- Step 3: Mark your zones lightly with painter’s tape, especially the “primary” band.
- Step 4: Dry-fit hook positions by holding tools up to the wall, checking overlap and handle angles.
- Step 5: Install the heaviest hooks first (shovels, power tools), then fill in lighter hooks.
- Step 6: Add a small catch-all for gloves, ties, pruners, and plant labels so they don’t migrate to countertops.
- Step 7: Do a two-week tweak: if one hook becomes a dumping spot, move it or change its type.
Mistakes to avoid (the ones that create clutter again)
A hook wall can look perfect on day one and fall apart by week three. Usually it’s one of these issues.
- Too many “unassigned” hooks: empty hooks invite random hanging, then categories blur.
- Hanging by tool heads only: rakes and hoes swing and tangle; handle-first is often more stable.
- No plan for dirty tools: muddy shovels drip onto clean items; consider a drip tray, boot mat, or a “dirty corner.”
- Ignoring kids and pets: if your space is shared, keep sharp or chemical-adjacent items higher and more secure.
- Over-optimizing labels: labels help, but if the hook type is wrong, labels won’t fix daily frustration.
If you’re trying to figure out how to organize garden tools on wall hooks in a tiny shed, don’t fight physics. Sometimes the right move is fewer tools on hooks and one narrow vertical rack for the longest handles.
Key takeaways and a simple next move
A clean tool wall is less about buying a fancy system and more about matching hooks to tool shapes, zoning by frequency, and mounting into something that won’t wiggle loose.
If you want an easy next step, pick one wall section, install hooks for your top 6–10 tools, then live with it for two weeks and adjust spacing. That small loop is usually what makes the setup stick.
FAQ
How high should I hang garden tools on wall hooks?
Most people stay happiest when frequently used tools sit between hip and shoulder height, so you can grab them without lifting overhead. Heavier tools lower often feels safer, as long as sharp edges don’t stick into walkways.
Can I mount tool hooks directly into drywall?
For very light items, sometimes yes, but long-handled tools create leverage that can loosen anchors over time. If you can, mount into studs or add a plywood backer board so the fasteners have real bite.
What hooks work best for D-handle shovels?
Large J-hooks or saddle-style hooks usually hold D-handles more predictably than small utility hooks. The key is giving the D-grip enough room so it doesn’t pop off when you pull a neighboring tool.
How do I keep rakes and hoes from tangling on the wall?
Give each head enough side clearance and avoid stacking similar widths right next to each other. Double-prong hooks often reduce spinning, and hanging by the handle instead of the head can also calm things down.
Is a slatwall or track system better than individual hooks?
If you like rearranging, track systems are convenient because you can move hooks without new holes. The tradeoff is cost and the fact that the rail still needs solid anchoring, so plan for studs or a strong backer.
What’s the best way to organize small hand tools on the same wall?
Small hooks work, but hand tools tend to multiply and fall behind things, so pairing hooks with a small bin or shallow shelf usually stays tidier. Keeping pruners and snips in one container also helps with safety.
How do I store wet or muddy garden tools on hooks without making a mess?
Consider a “dirty zone” at one end with a drip tray or rubber mat below, and leave a little gap between tools for airflow. If rust is a concern, drying tools before hanging helps, and severe rust issues may call for different storage or tool maintenance advice.
If you’re setting up a garage or shed and want a more streamlined approach, a hook-and-rail kit (or a plywood-backed hook wall) can save time because it gives you a consistent base to expand later, without turning every new tool into another mini project.